The Menu Bar consists of the clickable words at the top of the MIS2000 screen. Below you can see how the Menu Bar looks when you are in the COE View. In the Student View the word COE does not appear.
Now we will go across the Menu Bar and tell what choices are accessed by clicking on each word.
Record
Clicking on Record reveals three choices as shown below.
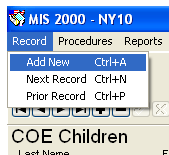
- Add New do not use this feature in the Student View. Each student record should be created as part of a COE. In the COE View it will create a new record.
- Next Record moves to next record in the database. This serves the same function as NAV button.
- Prior Record moves to prior record in the database. This serves the same function as the NAV button.
Procedures
Clicking on Procedures offers the choices shown below.
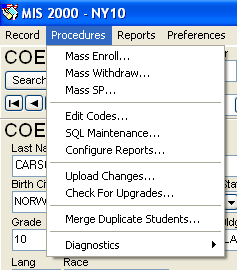
- Mass Enroll NY State data specialists are not allowed to use this procedure
- Mass Withdraw This can be used but requires MIS2000 coordinator's approval
- Mass SP Not currently used by NY State data specialists, requires MIS2000 coordinator's approval before using this procedure
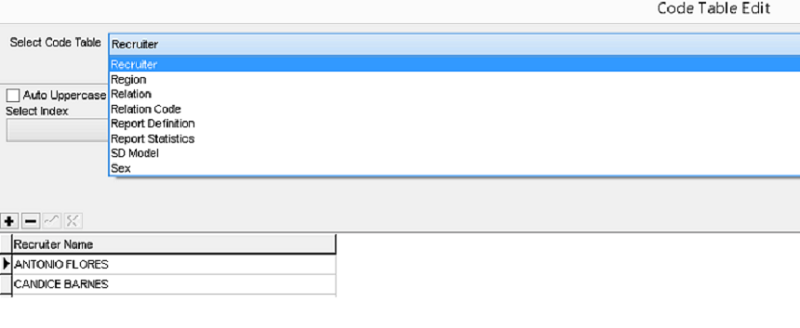
- Edit Codes When you select this procedure a Code Table Edit box appears. Under Select Code Table - select the appropriate table you wish to edit. For example, select recruiter in table, if you spelled a name incorrectly, then you may select a name and delete or edit it. Just use it to add entries or correct / delete your own errors.
- SQL Maintenance Not used by NY state data specialists.
- Configure Reports Please disregard, not used.
- Upload Changes This should be as least twice a day to send the data that you have added to the state server. (When you click this you will be prompted to Backup and Verify your database if you haven't done so in the last hour.) This takes you to the Upload Screen window. Click on the Begin Upload button. MIS2000 will connect to the server. Wait patiently for the process to completed. By using this feature, you will receive any new ECOEs from recruiters or Approved ECOEs from the ID&R/MIS2000 office.
Uploading changes to State computer (also known as "The Server")
When you do an upload to the state computer, the work you have done in MIS2000, such as entering COEs and adding enrollment information, will be copied to the state database. You should do an upload to your state at least twice a day. The state database should always have an updated copy of your work.
- Go to the Procedures menu, then select Upload Changes. The Upload Status window will appear.
- Press the Begin Upload button. When your changes have finished uploading to the server, you will see one of two things:
- If your upload has finished without any problems, you will get a message saying "Your upload has completed successfully." Your upload has not completed successfully until you see this message! You will also see the date of the upload on the Upload Status window. You can now close the upload window. Your upload is finished.
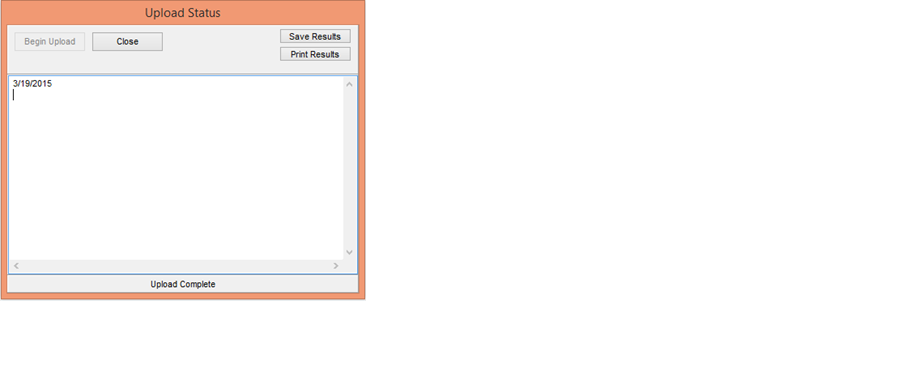
- If your upload encountered problems, you will get a status report with directions for making corrections, if necessary. If the status report isn't clear, contact the ID&R/MIS2000 Director. If you do receive a status report, you should print it out by pressing the Print button.
- If your upload has finished without any problems, you will get a message saying "Your upload has completed successfully." Your upload has not completed successfully until you see this message! You will also see the date of the upload on the Upload Status window. You can now close the upload window. Your upload is finished.
- Press the OK button. If there is an upgrade available, the upgrade will begin downloading to your computer. Once it finishes, you will get a message telling you to reboot your computer. Reboot at that time.
More on uploading
- Check for Upgrades After completing your daily upload your machine will check for upgrades automatically. Occasionally you will be prompted to check for an upgrade when you begin an upload.
- Merge Duplicate Students Currently this can be only be done at the state level. If you find duplicate students who need to be merge send name and student IDs for each student along with your preference as to which student ID has the most current/accurate information to the ID&R/MIS2000 Coordinator or Director.
- Diagnostics Look at this if you are curious. We don't use this often. MIS2000 might use it for troubleshooting.
Reports
This section is explained in a later chapter, Reports.
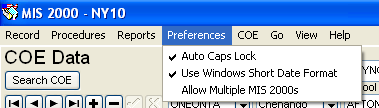
Preferences
Rarely needs to be used. Should be set with a check before Auto Caps Lock and the other two unchecked as shown below.
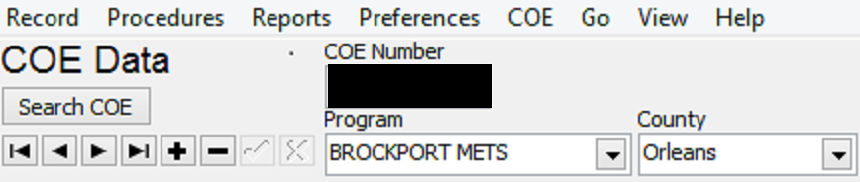
COE
Clicking on COE offers the five choices shown.
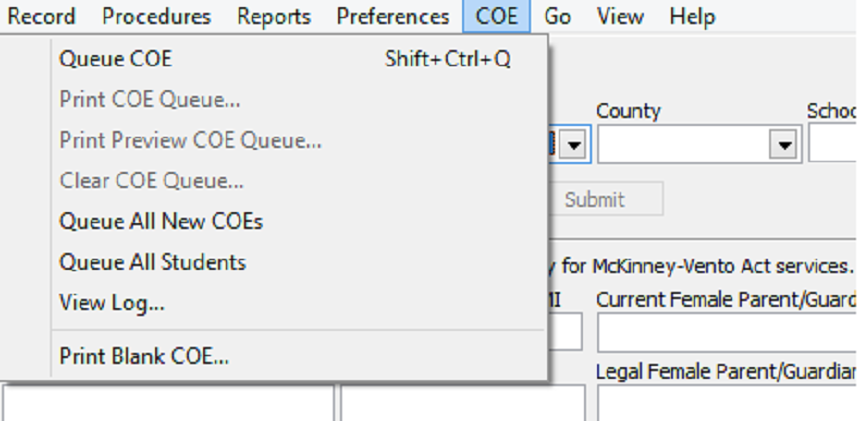
- Queue COE puts COE into printing Queue.
- Print COE Queue opens the Print Dialog box to print any COE that has been queue on MIS2000.
- Print Preview COE Queue creates a screen preview of all records in the COE queue. You can then choose to print the records, save them, or clear them from the record queue.
- Clear COE Queue removes all COEs from the printing queue
- Queue All New COEs a checkable menu item. If you check it, it will add each new COE that you enter to the printing queue.
- Queue All Students a checkable item. If you leave it checked, it will add all new students to the student record queue.
- View Log displays information regarding the current COE such as Date Submitted, Verified, and Approved.
- Print Blank COE prints a blank COE.
Go
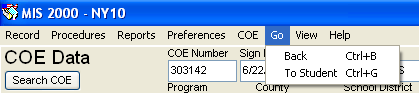
The Go menu provides you with a quick way to get to other information related to the student or COE you're currently viewing.
Example: Say you are working on the Student Data of Janet Smith. You want to see her COE. Go to the Go pull-down menu, and select To COEs. MIS2000 will then show you Janet's COE(s).
NOTE: If the "To COEs" menu item is grayed out (you aren't allowed to select it), then that child does not have a COE in your database. If that is the case, please send the information to the ID&R/MIS2000 Director
View
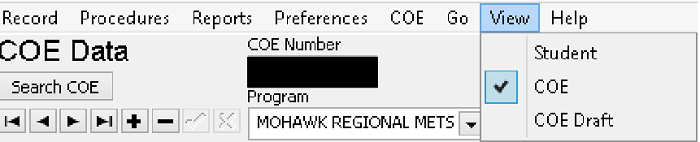
The View menu allows you to flip between the COE, COE Draft, and Student views.
- Student View contains screens for school history, supplemental programs, credit accrual, and any other information that is collected for our students.
- COE View contains screens for Census, Qualifying, Child(ren) and Departure.
- COE Draft contains the same screens as the COE View but it is exclusively use to review the ECOEs completed by recruiters. If you want to see if you have any new ECOE and Approve the ECOE, you need to be on COE Draft view.
NOTE: Changing the view does not take you to the COE/COE Draft/Student Data of the student you are currently working on. If you wish to see the COE/Student Data of your currently selected student, choose the Go pull-down menu.
Help
Clicking on Help shows two choices.
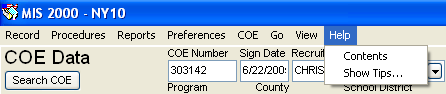
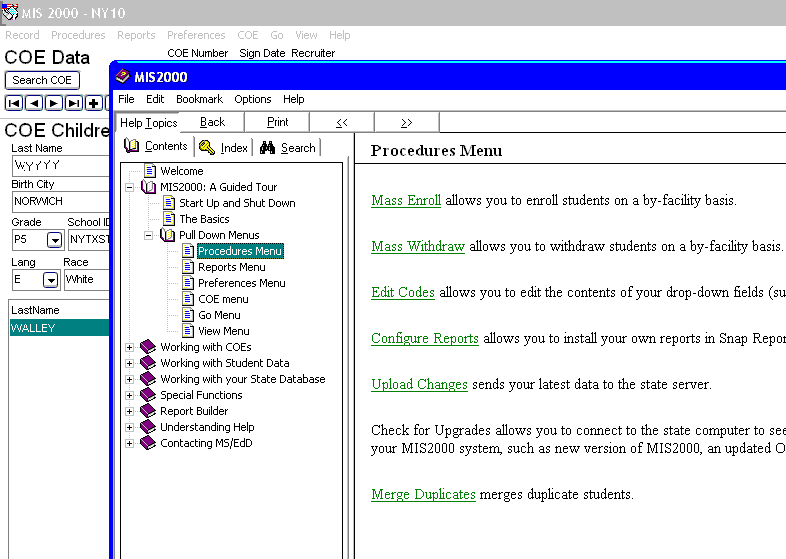
Contents
There is a lot of information available here and it can be very useful. By clicking on the + sign in front of a "closed book" icon you can access more information. Click on a topic and it will appear as shown below where "Procedures" has been selected.
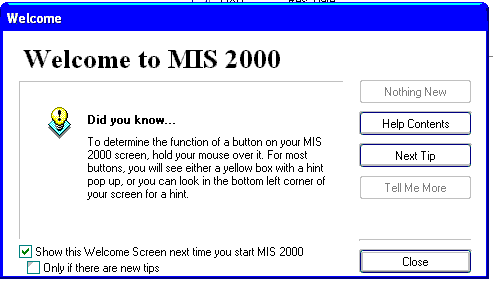
Show Tips
You can turn Tips off or on here by checking the box in the lower left hand corner of the window. Or you can choose just to see new tips.